


Beyond Passwords: Azure’s Workload Identity Federation for Secure, Secret-Less Automation
Revolutionizing Cloud Security with Seamless, Password-Free Automation

Introduction
In the ever-evolving landscape of cloud computing, security remains at the forefront of every organization’s priorities. As we navigate through complex infrastructures and diverse platforms, the traditional methods of securing applications and processes — often reliant on the management of secrets like passwords and tokens — pose significant challenges and risks. Azure’s Managed Identities and Workload Identity Federation emerge as key players in this scenario, offering a more secure and streamlined approach to authentication and authorization.
Managed Identities in Azure simplify the security model by eliminating the need for developers to manage credentials. Instead, identities are managed automatically by Azure, providing a seamless and secure way to access Azure services. Building on this, Workload Identity Federation extends these capabilities beyond Azure, allowing applications running outside of Azure to authenticate using Azure Active Directory (AD) without the need for secrets.
The significance of moving away from secrets in automation pipelines cannot be overstated. By eliminating the need to store and manage secrets, organizations can significantly reduce the attack surface and improve the security posture of their cloud environments.
This blog post aims to demystify the process of setting up a secret-less automation pipeline leveraging Azure Managed Identities and Workload Identity Federation. We will explore the foundational concepts, practical implementation steps, and the tangible benefits of adopting this modern approach to cloud security. Whether you’re an Azure veteran or new to cloud computing, this guide is designed to provide you with the knowledge and tools to enhance your automation workflows with unparalleled security and efficiency.
What are managed identities for Azure resources?
According to Microsoft’s documentation, Managed Identities provide an automatically managed identity in Microsoft Entra for applications to use when connecting to resources that support Microsoft Entra authentication.
I am not going to do a deep dive on the managed identities but all you need to know is in the linked article above from the official documentation, but I do think we need to say that there are mainly two types System-assigned managed identity and User-assigned managed identity.
In the following we will use the User-assigned managed identity to authenticate from Azure Devops to Azure using OpenID, from the federated credentials tab on the User-Assigned managed identity.
This guide will focus on Azure Devops.
Step 1: Create the User-Assigned Managed Identity
Create the User assigned managed identity that will be used in the Workload Identity Federation.
Step.2
Pick your project in Azure DevOps and navigate to the Project Settings, then go to the Service Connections and select to create a New Service Connection, there you can pick the Azure Resource Manager.
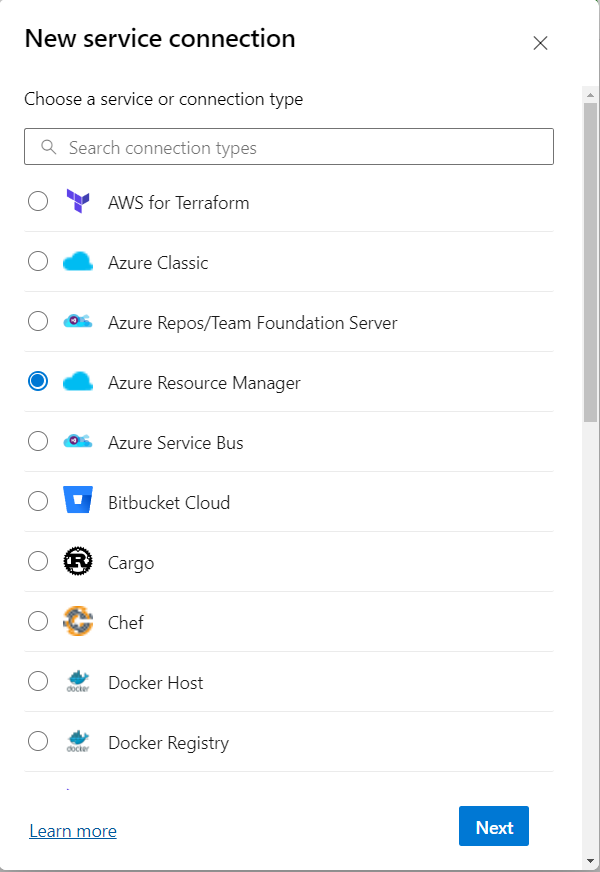
Step 3:
Select Workload Identity Federation (manual), hit next, and give the service connection a name.I usually pick the same name as the managed identity’s name for easier mapping. In our case, we pick NicolaesID, adding a simple description :
“Managed Identity used for Serverless Project”.
Step.4
Now the cool part after hitting next, you will get quite a few details that you need to use to connect it with the actual managed identity and configure the Federated credentials, keep this page open with the details as we need it in a few minutes. Now go and select your managed identity and go to the federated credentials tab.
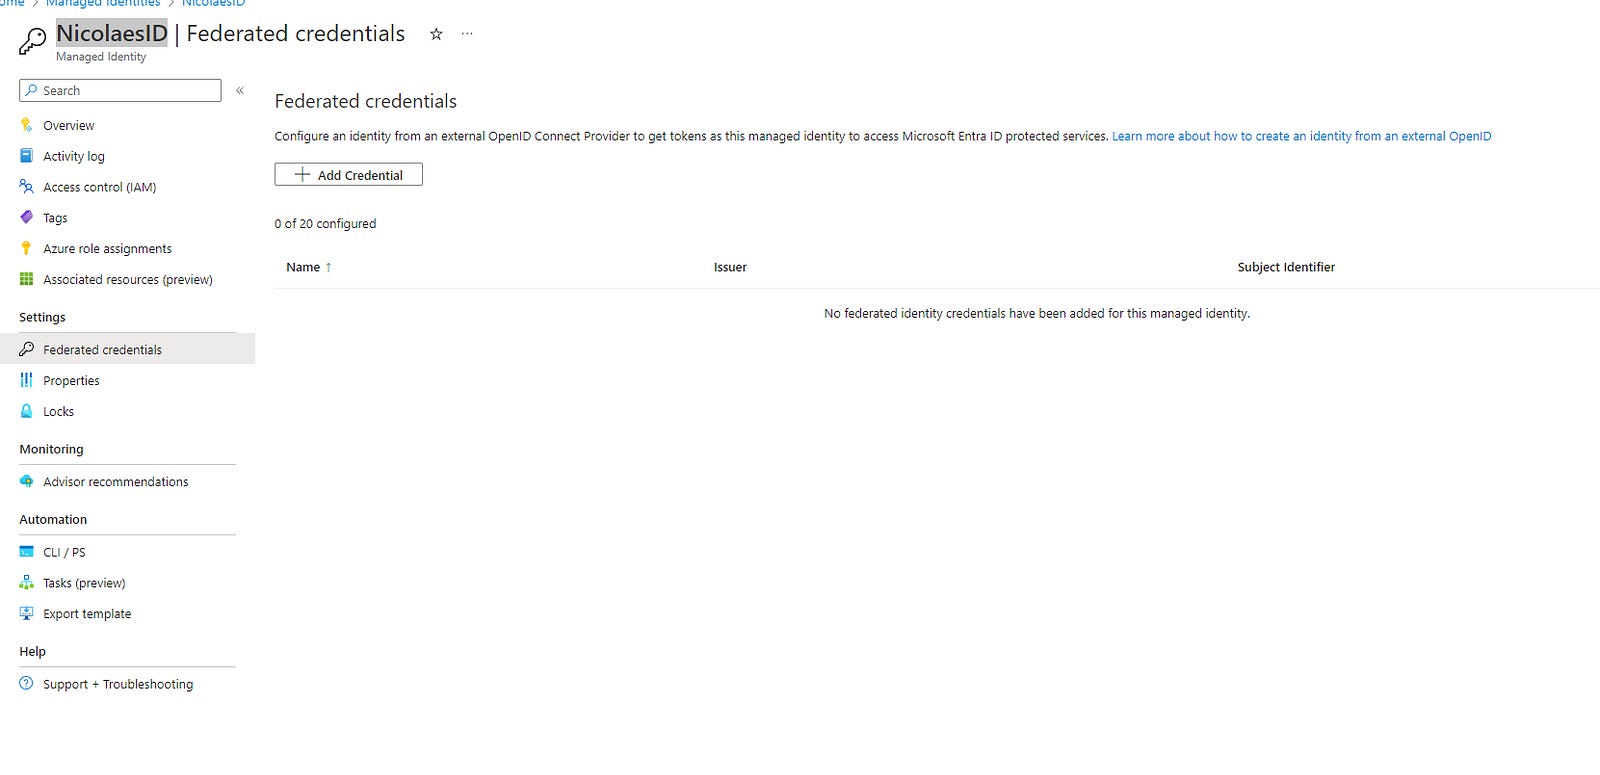
Select the “Add Credential” option
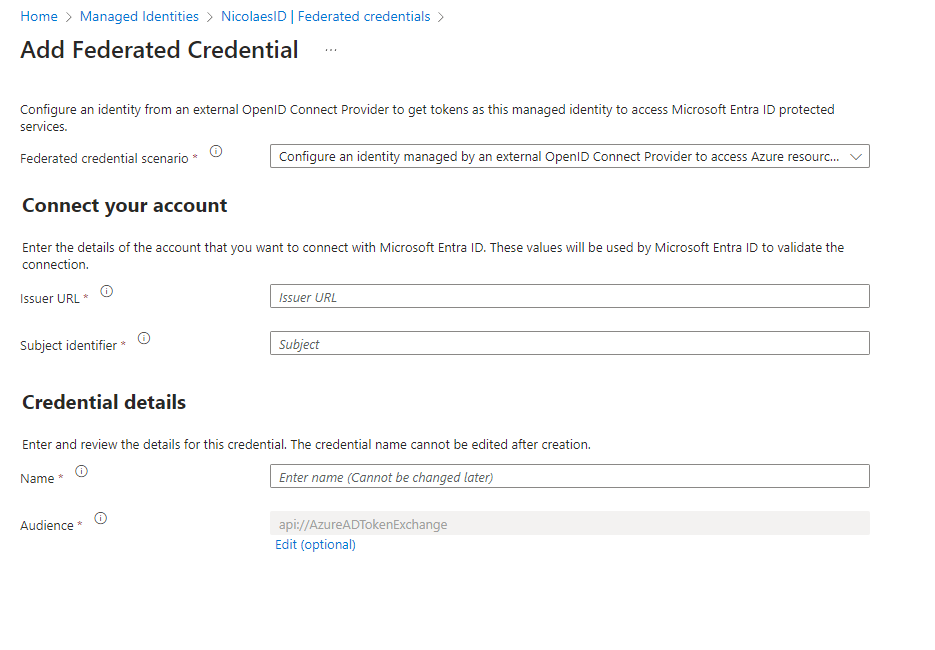
Remember when I’ve said that you need to keep your Azure DevOps tab open for those details? now here is where we need them.
Under the Federated Credential Scenarion, please select Configure an identity managed by an external OpenID Connect Provider to access Azure Resources
The Issues URL and Subject Identifier are the details that you require from the Azure Devops Tab.
Fill in the details from Azure Devops, and last but not least under credential Details, give it the same name, in our case NicolaesID.
Finish the Azure portal step.
Step.5
We still have work to do, in both sides, now lets continue the configuration.
For my purposes I select the Subscription Scope, and I am going to complete all the details, such as Subscription ID, subscription name , Service Principal ID and the tenant ID.
Before Hitting Verify and Save, you have one more step.
Step.6
Move back to our Azure Portal where we need to give the service principal a reader role across the subscription in order for us to Verify the functionality. If you were to verify and save now, it will fail. You can try it for yourself before applying the RBAC.
Select the Azure Role Assignments in your Managed Identity, select the scope again, such as subscription and give it Reader Role.
Now you can move back to Azure DevOps and click Verify and Save!
You have now succesfully completed the Workload Identity Federation using OpenID Connect and are ready to use it in your Pipelines.
There are prebuilt tasks that can benefit from this such as
AzureCLI@2 and others. There is a big list of supported tasks. All you have to do is to : replace <ConnectionName> with the actual name of your Azure service connection."
  - task: AzureCLI@2
    inputs:
      azureSubscription: "AnotherTest"
      scriptType: "bash"
      useGlobalConfig: true
      failOnStandardError: true
      scriptLocation: "inlineScript"
If this was helpful in any way, please let me know down in the comments.
Planning to write more guides and also provide documentation from official links whenever I think it would be beneficial.
There are a ton of guides on others, such as Github same principle but I didn’t really find something on AzureDevops, thought it may be useful.
Have a good one guys!
Nicolae-Loredan Calimanu